
Tiling a floor can be a rewarding and cost-effective way to enhance your home’s aesthetic appeal while increasing its durability. Whether you’re renovating a room or building a new one, tiling a floor can initially seem daunting. You can achieve professional-looking results with the right tools and materials.
How to tile the floor
In Pakistan, tiles are commonly used for flooring in newly constructed houses. Tile prices in Pakistan are also low, It is affordable and considered an essential element of home decor. There are multiple types of tiles available in the market, and flooring tiles could be tricky. And for this, you need an expert to install tiles on your house. Here is a Step-by-step instructions for tiling your floor.
Step 1: Gather Your Materials
Before starting, make sure you have all the essential equipment and materials.
- Floor tiles of your choice
- Tile adhesive
- Tile spacers
- Tile cutter or tile saw
- Trowel
- Level
- Measuring tape
- Chalk line
- Notched trowel
- Grout
- Grout float
- Sponge
- Buckets for water and mixing
Step 2: Prepare the Surface
Make sure the floor surface is clean, dry, and level. Remove any old flooring, adhesive, or debris. Fill any cracks or gaps with a suitable filler and allow it to dry completely. It’s essential to have a smooth and equal surface to secure the tiles attach correctly.
Step 3: Plan the Layout
Plan the Layout Begin by planning the Layout of your tiles. Use a chalk line to create a reference line in the center of the room, dividing it into equal sections. Dry-fit some tiles along this line to ensure they align correctly. Adjust the Layout if necessary.
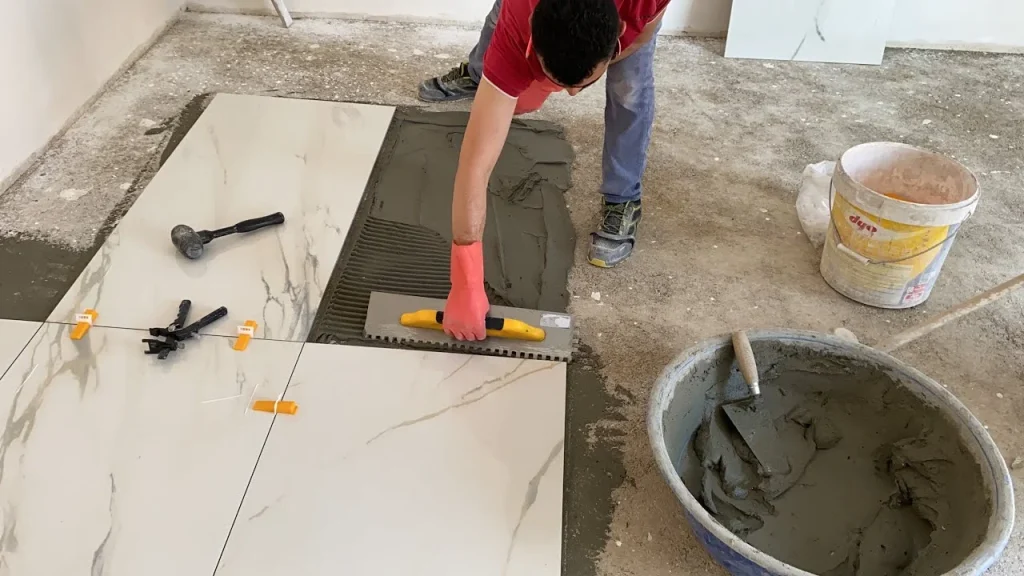
Step 4: Apply Tile Adhesive
Starting at the centerline, spread a thin layer of tile adhesive on a small floor section. Your adhesive should be used according to the manufacturer’s instructions. Create grooves in the adhesive with the notched side of the trowel, which will help the tiles stick better.
Step 5: Place the Tiles
Carefully place the tiles on the adhesive, following the reference lines you created earlier. Maintain uniform spacing between tiles by using tile spacers. It is important to press firmly into the adhesive of each tile to ensure a strong bond between them.
Step 6: Cut Tiles as Needed
You may need to cut tiles to fit when you reach the edges or obstacles like corners or pipes. Make precise cuts with a tile cutter or saw by measuring and marking the tiles. Whenever you cut tiles, you should wear safety goggles.
Step 7: Allow Tiles to Set
Allow the tiles to set in the adhesive for the time recommended by the manufacturer, typically 24-48 hours. Stay away from newly fitted tiles at this time.
Step 8: Apply Grout
The grout should be mixed according to the instructions provided by the manufacturer. Grout floats are useful for spreading grout evenly over the tiles and ensuring it is pushed into gaps. You can clean off excess grout from the tiles by sponging them with a damp sponge. Make sure the grout dries before using.
Step 9: Clean and Seal
To remove any remaining grout haze, dampen a sponge and wipe the tiles after the grout has dried. You can enhance the longevity of your floor by sealing it afterward with a tile sealant.
Conclusion
Tiling your floor can be a rewarding DIY project that gives your space a beautiful and durable look. It is possible to achieve professional results if you have the right tools and follow a systematic approach. Take your time, follow the manufacturer’s instructions, and, most importantly, enjoy the experience of transforming your space.


